Screen Printing is one of the earliest, simple and widely used form of printing, Over the period of time the materials and the process involved have changed and made it cheaper and easier to learn and master.
This site illustrates screen-printing in a step-by-step process, so that people from all walks of life and age groups can use it.
Materials for Chromoline Screen Printing
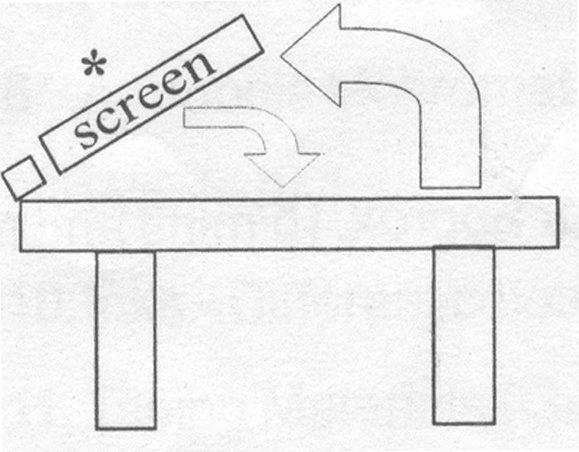
- Screen *
- Table **
- Exposing Film - Chromoline
- Photocoat - poly blue
- Exposing Glass (plain glass)
- Squeezer - Different sizes (Pref.size for beginners is 5 inches) Reducer (for cleaning the screen and mixing)
- Ammonia bichromat (Powder)
- Waste (White)
- lnks - Different colors
- Taping Materials (Gum type)
- Sponge
* The mesh used in the screen comes in different varieties with the price ranging from Rs 35/mtr to Rs 600/mtr, for beginners the recommended variety is 140 S. The screen also comes out in different sizes, for beginners medium size is recommended.
* * An ordinary table can be converted into screen table by fixing a wench to one of the side of the table. (Ready-made table are available in shops) The materials are available in all printing accessories retailers.
The Essentials
Tracing sheet:
First the subject to be screen-printed is designed in a computer and the printout is taken out in a tracing sheet.
Poly Blue – Ammonia Bi Chromat Solution:
The solution is prepared by pouring poly blue solution in a small vessel and adding a pinch of ammonia-bi-chromat powder.
Method:
- Cut the film to the desired size and place the screen over the film. Make it sure to place the pink colored side of the film to the screen.

- Pour the poly blue ammonia-bi-chromat solution on the screen and using the squeezer spread the solution to enable the film to stick on the screen (As in the pic above)
- Dry the screen well for approx.15 mins till the screen is dry

- When the screen is dry, carefully remove move the backing sheet (As in the pic above)
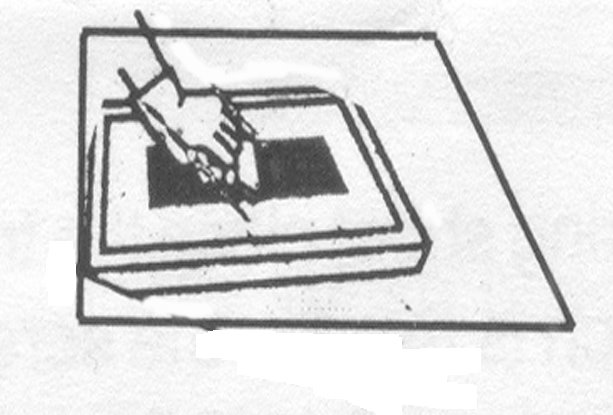
- After removing the backing sheet place the tracing sheet (or the negative film) over the film which is fixed to the screen and cover it with a exposing glass, (place the setup over any soft material) and expose it under bright sunlight for 30 seconds. While exposing press the glass slightly (as the shown in the pic above)
- Wash the screen (on the inside) with water
- Dry the screen under the fan or sunlight for approx.15 mins or till the screen is dry.
- When dry cover the immediate surrounding areas of the exposed area with any taping materials so that the ink does not seep thro' screen.
- The screen is fixed to the wench in the table using a clamp (As in the pic above. Pour the ink on the Screen, Place the material to be printed (visiting card or any other source) in the table, place the screen on the table, spread the ink on the screen using the squeezer, the image will be printed on the required material (visiting card or any other source). Lift the screen remove the printed card and place the next card, repeat the same process (As shown in the pic below).


* Printing double colors - Cover the matter to be printed in other color with a tape (on the outer side of the screen) and squeeze, change the colors, remove the tape and cover the other matter on the screen and squeeze. Do not remove the settings while doing two colors.
* Spread little gumming solutions on the printing table to prevent the printing material from shaking during squeezing.